top of page

5th at LGT with CSM as Creations of Bile make it to round 8 - Photo heavy tournament report.


LGT 2022 was my fifth time attending the event, although the 4th time for 40k. Its had my personal best achievement (going 5-0 last year with my CSM/Death Guard soup list) and my worst tournament (going 2-3 in early 8th ed with Alpha Legion.)

Chaos take the fight to Leviathan as the battle heats up.

All the events have been using a Chaos army of some description (ok there was one heresy event were I was technically running loyalist Death Guard list but shh) and given Creations of Bile have been doing well for me in my other events/local games it was easy enough to give them another go for the big one this year.


As a quick run down of the list - its aiming to be ultra aggressive and use its fights on death to win trade wars. There's a unofficial rule of 2 in the above list - it wasn't a deliberate choice to not pick 3 of anything but there was a deliberate thought to keep my types of threats spread out. The most eye catching aspect is probably the Patrol in addition to the Battalion. Previous readers of the blog may be aware that I really wanted 2 HQ casters in order to have access to Warpcraft secondaries, but I didn't want both a Master of Possession and a Dark Apostle in the list as I felt I had too much support and not enough punch when I went this route and with the Nurgle Daemon Prince a shoe in (the Deamon weapon auto wounds on hits and ignores phase caps, a super important ability when your army barley even does chip damage out of combat) it was hard to figure out what to go for. I'd thought about dropping all casters to open up Abhor at least, but in the end went for the extra patrol to allow a second Prince with mark of Slaanesh to keep Warpcraft as a back up caster who's main job was to cast 5+ FNP on the Chosen. The Chosen's job with the Apostle's 4+ only to hit and no re-rolls, 5+ fnp and Black rune to ensure they were -1 to be wounded at all times were designed to be the hulking bruiser of the army and get thrown straight at the enemy and take all the nasty threats head on - they might not always win but they hopefully shouldn't lose quickly at least.


Otherwise speed was the name of the game, 2 Warp Talon units to hit the flanks and 2 Possessed often with 1 of each taking a flank for early pressure. Behind them, again often split near the flanks were 2 Lord Discordants trying to secure the flanks after the first wave ideally caused a huge mess and took out any threats to them. Cultists, Spawn and Legionaires round out the list - cheap units for holding objectives, and in the legionaries/cultists case obsec + actions. Basic plan was to go for The Long War and Specimens of the Spider as secondaries - both reward killing units on objectives and trading in the middle and use my units to be hyper aggressive in taking opponents to deny opponents the chance to play around the Long War without heavily sacrificing primary. Then I could go either Banners or Warp ritual depending on match up or take a kill option were apt so I wasn't relying on a opponent giving up something in order to have a decent secondary game.


After taking top Chaos last year (Chaos keyword, so essentially top Chaos Soup player, 2 DG players got higher than be when any Chaos armies were included) ,aim was to go 4-1 and maybe sneak top CSM player


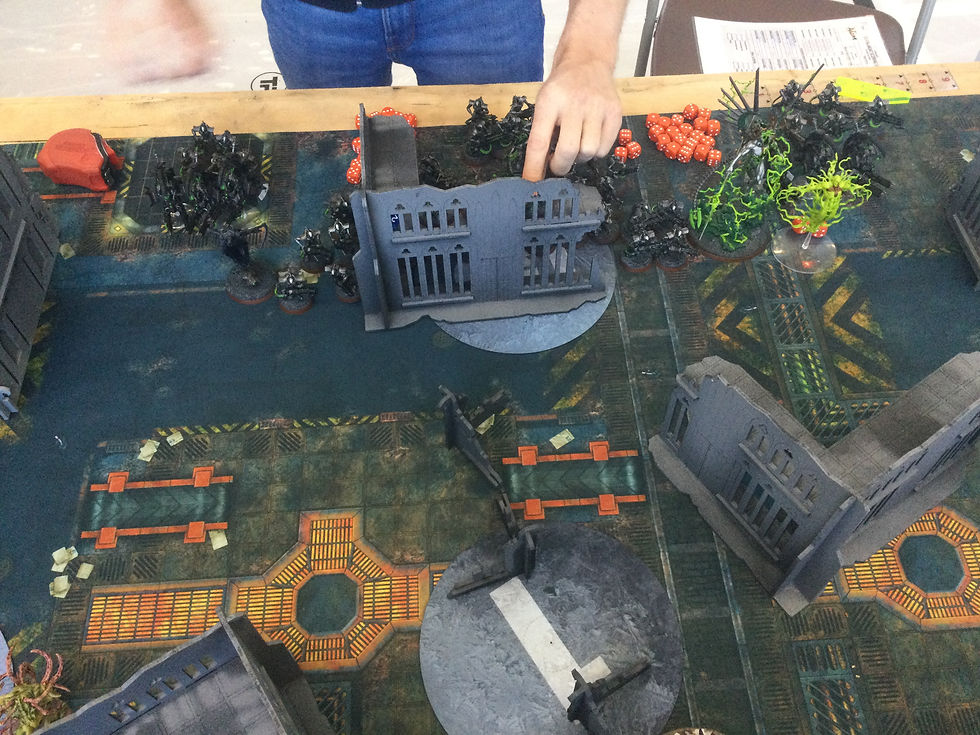
Round 1 - Abandoned Sanctuaries. Adam Smith's Necrons.


My Secondaries: Specimens of the Spider, The Long War, Warp Ritual

Opponents Secondaries: Treasure of Aeons, Ancient Machiner, Purge the Vermin.


Pregame thoughts - The advantage of game 1 is you can do a lot of stalking/research. Sadly my research showed my opponent was pretty regular attendee at tournaments as Necrons which wasn't the start I was hoping for. Otherwise the list had a few problems to deal with - Necrons Obsec and Secondairies both outperform what I can do and given my army does about 95% of its damage in combat phase the 3 C'tan are a real pain to deal with. I had to real deliberate between Warp Ritual and Banners as my last secondary - I wanted to have the Princes free to roam around casting Smites into the C'tan but felt there were probably going to be at least 2 turns were the C'tan would be screened so 7 on Ritual was going to be better than easy 5 on banners + maybe a few last on if the game goes well. The mission not allowing pre-game moves upfield was a mixed blessing - I didn't have to worry about any charges but I did want Necrons to the close the gap. Plan was simple with 3 objectives in no mans land, get upfield, be aggressive and try and force Necrons to run out of obsec units by trading into the middle repeatedly.


Chaos deployment - spawn placement is to ensure if the Warrior blob teleports turn one they can't make Lord Discordant the closest target.
Necrons deployment after pre game shuffle.
Chaos move up aggresively in the middle, Discolords prepared to be a bit exposed in exchange for some (ineffective) flamer shots.
Normally I keep cultists back on my home objective but with several Tomb Blade units I was worried about them finding a angle to snipe them off so, hence the more durable legionnaires at the back.
Pretty mirrored on both flanks, Warp Talons taking a flank objective whilst Possessed back them up.
Necrons start moving, but mostly stay back cautious of Chaos combat potential
Speedy Obsec units take the objectives whilst C'tan start softening up CSM with mortals.
Same story on the right flank as Necron secondaries help give them an early lead.
End of turn 1 - Necrons didn't kill much of note and Chaos are in a position to attack.
End of Chaos movement - Warp Talons go deep into Necrons deployment whilst whats normally my second wave goes to take the middle.
End of Chaos turn 2 - Talons have tagged 2 immortal units to try and stop them from falling back, Possessed tag the Warriors to try and force them to use there one per game teleport early.
Talons on the right also make a charge deep into Necron lines, as Necron turn start they have to push Chaos out of there deployment rather than focus on middle.
Blurry pic - but the combination of cultists and Spawn I had available meant I could screen out my half of the board entirely from Necron deep strike threats (2 Flayed Ones units and Veil of Darkness Warrior Unit.)

Both Immortal Units win the roll of to fall back from Warp Talon who die horribly but the ones on the right are mostly fine at this stage.
Void Dragon lines up a charge but ends up failing and as a result Necrons can't throw any scoreboard pressure back.
Flayed ones make a 9 inch charge into the Warp Talons but end up getting destroyed with 2 Warp Talons left alive. Chaos have control and a chance to really end the game as a contest early.
Chosen make a multi charge into Transcendent C'tan kiling it and all but one Warrior. By the end of Necron's command phase about 15 Warriors had come back.

My turn 3 threatened to be decisive but the Void Dragon made 6/6 4+ invuls saves and murdered my Nurgle Daemon Prince as Chaos momentum stalled. I didn't need to make this charge and could have held of a turn to soften the Void Dragon up first - it was a greedy if not unreasonable play here that I didn't need to make.
End of Necrons turn 3 - Void Dragon and Nightbringer 'smite' the ressurcted Nurgle Prince to death and start softening up the Chosen.
Necron Warriors teleport away and manage a long charge into my Legionnaires on my left flank. They warriors take a beating but retake the objective as Flayed ones commit.
C'tan are softened up and in the open to give Chaos a chance to start taking them out.
Slaanesh Prince had been charged by the Void Dragon but managed to spike his saves. There was a chance to Smite it down to 3 and try and kill the Void Dragon in combat but I chose to place safe and fall back and take the objective with the help of the spawn.
Void dragon is left alone but ends up taking a bunch of mortal wounds from the Nightbringer exploding as Chaos retake the flanks and leave Necrons in a dire spot.
Chosen always get the dirty jobs but had managed to take out the Nightbringer.
Game is essentially over now as Technomancer goes in on a last ditch crazy play.
Slaanesh Daemon Prince is charge by the Void Dragon again, and for the second times spikes saves and manages to get revenege for his Nurgle brother killing the last C'tan as Necrons are tabled.

Result - Chaos win 93 - 47


Postgame thoughts: Comfortable win on the scoreboard, although the momentum threaten to shift back very hard in the mid board when my Nurgle Prince with the ignore phase caps and auto wounds bounced entirely off the Voiddragon and got murdered (twice) in return. Thankfully the Slaanesh Prince managed to hold the C'tan long enough in the middle to ensure there wasn't a late swing. The gameplan worked well - the Necrons didn't manage much early damage into my Warp Talons early on and they made them pay dearly as Necrons spent most of the next few turns trying to secure there own backfield rather than retake the middle and I was able to repeatedly tag units to limit Necrons shooting. The large Warrior squad only had one chance to shoot all game and in fact elected not to do so in order to keep there charge manageable. With Necrons shooting nuetered, the C'tan couldn't carry the burden needed by themselves as my combat outclassed anything else Necrons had. An excellent start for Chaos.


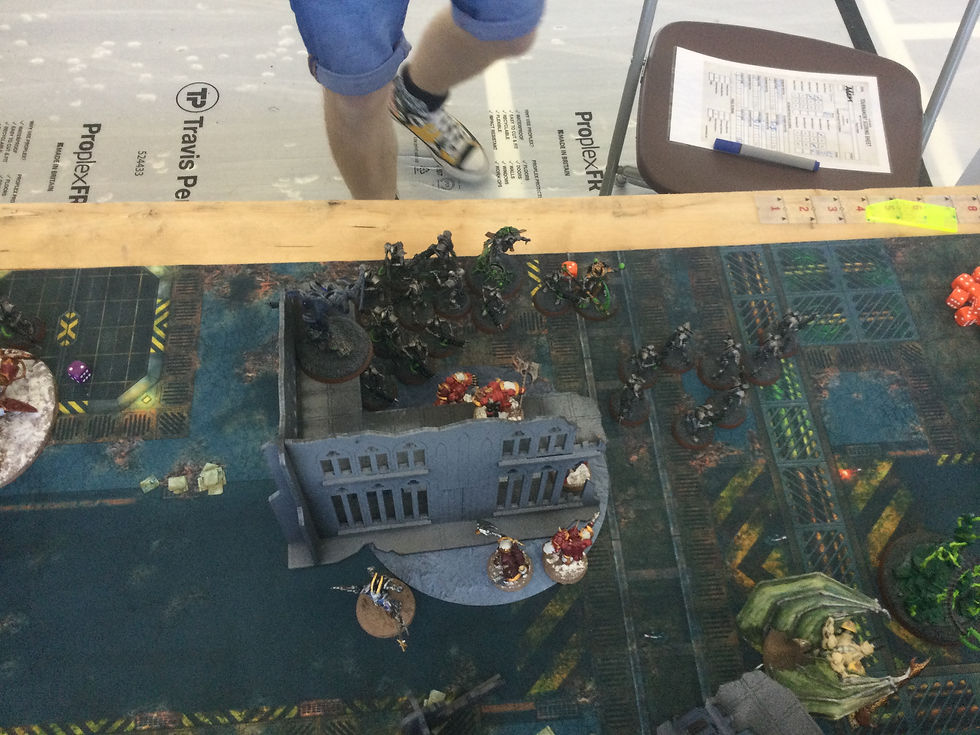
Round 2 - Data Scry-Salvage Callum Brownson-Smith's Levithan Nids.


My Secondaries: Specimins of the Spider, The Long War, Banners

Opponents Secondaries: Mental Interrogation, Assasinate, Banners.


Pregame thoughts: So this is a really tough match up, and on the toughest mission in the event pack I'm likely to play (play the foreshadowing music here though.) Levithan is an army that can take my punch in combat and deal as good, if not better back. The Possessed v Warrior comparison is a good representation of the difference here, on datasheet the Possessed is tankier and faster with Bile v Levithan chapter tactics both very good in there own way but the Warriors have much better strats/command abilities to throw on them, have obsec and have a variety of scary guns. I played David Gaylards Levithan list which has alot of similarites to this, on this mission at Unconqourable a few weeks back (write up available on this site as well) and it was a real struggle flipping back objectives. Plan was to go very hard into the middle, try and get Chosen into Warriors if possible as they aren't blunted by -1 damage as badly as Possessed and can potentially grind them out if things go well and then expand into the flanks later if possible. If things went well with that, then given my opponent had Assasinate possibly back of in the late game to keep them hidden and try and take a lead on secondaries that way.


Chaos win turn one and move up. Charaters are protected from Harpy sniping runs and Cultists/Spawn move up to esnure Maleceptor smites aren't eating anything too valuable.
Possessed and Legionaires take a point each and try and stay as far from retaliation as possible.
Broodlord had forward deployed - Warp Talons ripped it to shreds for a early boost on both Bile and Long War.
Maleceptor hides behind the Nid lines and starts throwing a library of Magic the Gathering card buffs out
Right flank going into Nids turn one
Nids start swarming back on the right, my Warp Talons start weighing up if they should go in for the Harpy next turn.

Nids retake the middle-right without much difficulty.
Chaos turn 2 movement - the Legionaires on the left survived a Warrior shooting barrage for some early primary. The Possessed prepare to make a charge into the Warriors - I wanted to set up 2 units charging in with D2 attacks so they could only protect one of them.
The Lord Discordant was the other part of my plan. The Warp Talons really wanted to charge the Harpy but I relucantly decided to try and kill the Gargoyles instead and focus on objectives.
The Warriors at the top use the -1 damage strat and the Possessed are mostly ineffective as a result.
Things start going wrong - Nids have there 5+ invul imperative up and the Warp Talons kill 9/10 Gargoyles to leave Nids with the objective. Worse the Lord Discordant bounces almost entirly off the Warriors who kill him back even through his own -1 damage strat.
Things don't improve here - the Maleceptor spikes his save v my Daemon Prince and whilst I retake the objective and degrade it, it survives the combat against my 3 nastiest combat units. The Chosen make sure to base the monster whilst the Prince is slightly back to ensure it can't be smitted.
A ok turn on the scoreboard for Chaos, but its cost me a lot of units and I'm stretched very thing already with the Hive Tyrant yet to commit.
My Baleflamers had managed some Chip damage against the Harpy but its bombing runs were unaffected as I lose my tender grip of the further right objective.
The Tyrant Guard are about to move up to deal with the Possessed as Venomthropes move in to help the Maleceptor out.
Hive Tyrant swoops in as Chaos grip on the left flank is challenged.
My Daemon Prince is murdered and rolls a 1, failing to come back to life at a critical time.
Warriors slowly winging against my Possessed on this flank, whilst the Hive Tyrant kills my legionnaires although the objective is contested by my Lord Discordant to keep both banners on this side of the map up for Chaos.
Warriors destroy the Warp Talons without much difficulty - I made sure to overkill the Gargoyle with my attacks on death rather than try to soften up the warriors to ensure 1 less asset was available for Nids.
One Possessed left alive and prepares to fall back to the objective.
Lord Discordant takes a deep breathe as they realise they have to kill the Hive Tyrant to keep me in the game.
Prince moves in to try and take out the Harpy as Chosen battle the Venomthropes.
Possessed had comfortably beaten the Hive Guard. They had a choice between trying to take out the Tyranid Warriors on the right and didn't fancy it - even if they won the attrition war they weren't retaking the objective soon. Instead they go for the Nids Maleceptor behind the wall here - even if they can't get past the 3+ invul they will retake the objective.
Lord Discordant baleflamers the Hive Tyrant to leave it on 7 after the Legionaires had softened it up a little as well.
Harpy only fails one save and is left alive on 2 wounds to leave it able to keep bombing and able to snipe away at my units. After here I had to ignore it and just focus on units on objectives.
Nuerothrope can't pass enough invuls and Possessed take Nids home objective.
Huge moment - Lord Discordant manages to just take out the Hive Tyrant. I spend every available CP on defensive strats (-1 to hit/-1 damage/cp re-roll) and it manages to survive the Hive Tyrant back in a huge momentum shift.
Yeah, I'm not going near those Warriors again.
The seesaw of balance is briefly in my favour on the left - but the Zoanthropes smite the Lord Discordant to death. I blow my last CP on a deny to try and beat an 10 to keep him alive but fail.
Huge moment in the game - the Warriors get scared of potential multi charge from Chosen and Posseessed and hide back in the corner out the game. I elect to leave them well alone!
Chosen and Possessed are hiding behind walls - if the Warriors had been more aggresive here I would have needed a huge high roll to stop them.
I'm strecthed to breaking point here, but my Chaplain and Prince both make decent charges to get to the Zoanthropes and take them off the objective (Spawn activates last to ensure it can get closer and take a smite if needed.)
Nids turn 4 - I have 2 cp at this point and have been saving them entirely for this moment. Harpy makes a bombing run, but degraded it can't kill of the last couple of Cultists. I burn my CP to auto-pass morale to ensure I can keep primary.
No pics of my turn - Possessed and Chosen move as far from the Warriors as possible whilst bieng on the objective and I finish off the Zoanthropes. Harpy moves in to start shooting my charatersand the Parasite infests my Chaplain and Daemon Prince multiple times over the turns and eats them away as Nids start wracking up assassinate points.
Warriors realise there mistake and move up. On my last turn the Possessed do try and charge them to tie them up but fail. I'm almost tabled at this point and Nids get 12 points on the last turn but I've managed to just deny them for long enough.

Result - Chaos Win 86-61.


Postgame thoughts: Jeez, this was tough game, and a utterly fantastic one with lots of momentum shifts. Losing the Lord Discordant and not killing the Malectopor in back to back combats felt like a hammerblow early and I really felt like I was always struggling for options. However two key things in my favour - I had more cheap disposable units and one decision to play safe with the Warriors. On the disposable units front I was able to keep my 50 point Cultist squad at the back doing the mission action all game which wracked up 12 points, whereas Tyranids ended up having to commit there respective action monkey (Tyranid Guard) up to try and slow down my Possessed and only scored 2 points on the mission action as a result. Speaking of the Possessed, when CP ran out for -1 damage on the Warrior my opponent put his unit on the right flank well towards the back of the objective to keep them safe, but put a huge unit I realistically needed a large high roll to kill out the game for a turn and allowed me to free up units elsewhere and ignore the warriors for a few turns. By the end of the game I was as good as tabled - I had 2/3 Cultists left hiding at the back as well as 1 chosen/4 Possessed right next to a Tyranid Warrior unit that could have murdered them both easily enough but chose instead to place a banner down on the last turn instead. Really happy with the win in a brutal game - always think its a good sign when you've lost the attrition war but managed to pull out a win regardless.


Round 3 - Death and Zeal v Simon Corder's Space Wolves


My secondaries: Specimins of the Spider, The Long War, Warp Ritual

Opponents Secondaries: Glory Kill, Mighty Saga, Warrior Pride


Pregame thoughts: Space Wolf secondaries showing the way they want to play - 2 based around killing my Characters one of which revolving in there Wolf Lord being a hero as well and the last secondary around charging me. All of these I'm ok with - head on head fights normally go Bile's way so happy to oblige. Wulfen feel like the key unit here - they have this really unfair broken mechanic were they get to fight on death for free, so playing around that with my combat army is going to be interesting.


Chaos Deployment - minor screening to keep wolf drop pod out of my deployment with Cultists across the front incase Wolfs charge in turn 1. Mistake with my placement - should have one legionare within 3 of the right Discordant to double protect it from shooting.
Majority of Space Wolfs deploy back on there objective. Wolfen are just out of shot to the bottom of frame.
Incursors infiltrated up on the two no mans land objectives not in the centre of the table..
Space Wolfs win turn one and start charging upfield with a reckless aggression that I would be proud of.
Wolfs can't get a the Chosen easily and prepare to secure the bottom right flank.
Space Wolf drop pod comes in and starts lining up shots.
Said earlier about mistake in deployment - one legionaire a inch to the right protects the Lord Discordant. As it is, he rolled well on his saves after Warp Talons are killed by the first Long Fangs squad to stay alive.
Wolfs dispatch my Cultists easily enough, the Wulfen charge my Legionaires who manage to take out 3 of the Wulfen back to my surprise and delight.
Chaos meet aggression with aggression. It was clear that whatever the result this wasn't going to be a long game.
Chaos made 7 turn one charges, here the Warp Talons get into the north left Incusor squad with Legionaries advancing to provide obsec incase the Warp Talons don't kill there target.
End of Chaos turn 1. A Wolf Guard, 5 man Wulfen squad, 2 man Wulfen squad, Wolf Lord, Chaplain and Incusor squad are dead for the loss of a few chosen.
Space Wolf turn 2 - Wulfen try and avenge the Incusors. They low roll into the Warp Talons who kill them back.
The south right flank is secure for Wolfs as a second wave of attack launches into the middle.
Wulfen make a dent into the Chosen, but the buffed up Chosen emerge victorious again.
End of Chaos turn 2 - Middle is secure and I take the right objective. Made slight mistake here - I charged two Spawn into the Long fans trying to tie them up and both were killed (one in overwatch.) If I'd left them just outside of charge range they couldn't have got into a position to shoot the Prince next turn.
In the ruin (under the dice) the remaining Warp Talons fresh of seeing of a Wulfen charge go into the Space Wolf Elimators.
Space wolf turn 3 - things are pretty desperate for them. The Prince survives the Long Fangs shooting and they charge in to try and kill it.
Unsurprisingly, it doesn't go well for the Long fangs.
At this stage I'm so far ahead I'm actively trying not to kill Space Wolfs, but they keep charging in and fights on death is working to my disadvantage as I want the game to keep going to pick up more Bile/Long War points!
Actual Wolfy wolves charge in and Space Wolves are tabled in turn 4.

Result - Chaos win 91-56


Postgame thoughts: Huge win for Bile, the scoreboard didn't necessarily show it this was the most comfortable win with scoring only stopped because I ran out of units to kill despite my best efforts as Space Wolves just kept charging in! I'd love to say I used my fight on death knowledge to play around the Wulfen, but in the end all that happened is they charged me 3 times and 13/15 died due to me fighting on death or tanking the hits and fighting back, otherwise I shot the last one and in played around a singular Wulfen fighting on death. Huge match up advantage for me here otherwise - Wolfs do hit MUCH harder than Bile, but Fight on Death more than levels the playing field and the Space Wolf aggression needed to be a bit more measured into Bile, as it was the game was mostly over by the end of my turn one and despite some fierce resistance from the Wolfs things snowballed quickly for them. Few little mistakes from me in hindsight, none of them particularly consequential but something to learn from.


Round 4 - Tide of Conviction v Giulio Ghermandi's Drukari


My secondaries: Specimens of the Spider, The Long War, Banners

Opponents Secondaries: No Prisoners, Take them Alive, RND


Drukari lists never seem to end!


Pregame thoughts: Against ITC top Drukari player now, not an ideal mission for me - I'd always prefer a 5 with a central objective but not terrible either. The Dawn of war deployment + boats gives Drukari an ability to push my objectives without putting there fragile but powerful infantry in danger, but again fight on death gives me a lever and a great way to counteract the various fights last they have. Having played v a excellent local Drukari recently my main aims are to be aggressive to keep the fight on there side of the board and to to try and keep all my models in a unit within 0.5 inches of each other so they can fight through each model easier to try and stop Drukari boats making themselves closest target so I can't pile into Incubi/Wytches etc and have to hit them.


Some evil twisted, but lovely looking models
Drukari deployment - hiding at the back behind ruins.
Chaos deploy in similar fashion - with some screens to protect characters from cheeky Dark Lances.
Drukari win first turn a a few boats pop out.

Ravager pops out, takes some shots before hiding back.
I'm not sure why I left a Spawn in the open, the Venoms lined it up quickly enough to punish a minor misplay.
Bigger misplay as I fall into Drukari trap. I'm over aggresive on this flank, trying to charge the Raider and make a 7 charge into Wracks (failed with CP re-roll.) Given I had end of game scoring pressure on my side I only needed to throw one unit up. Close to Drukari lines they can line there match ups and position well back.
No midfield objective for me to bully, Chosen do move up centrally to threaten Drukari objectives next turn.
View from sideways on - Chaos move up to try and force Drukari engagements on right flank.
Incubi and Archon prepare to take on Possessed
All manner of Wracks and Grotesque creations come forward. Fabious Bile and Haemonculi should really compare notes.
Grotesques go deep into Chaos lines
Reavers join the frey as they go in trying to assasinate my Dark Apostle.
Drukari make early gains on the left, both Chaos squads are killed for little benefit.
Warp Talons are killed as Grotesque's take comparatively little damage.
Incubi and Possessed murder each other, one Possessed tries and fails to pop the Shadowfield save.
Chaos turn 2 - Discolord moves up, more to apply pressure and keep Drukari back as I mostly focus on trying to stabilise my side of the board with everything else.
Potential failure point here - Cultists move up to charge a Raider hiding in the ruin north of shot. If they fail, the Lord Discordant can't get into the Grotseqes, thankfully they Cultists make there charge and deny Drukari primary.
Prince goes into Archon and bounces of its Shadowfield.
Turns out -1 damage, inul, FNP and ignore first failed save a phase makes the Wracks nightmarishly tough to chew through.
Chaos secure there own objective.
Discolord can't break through the Groteseqes on the right flank either as Chaos's damage can't make a breakthrough.
Side shot of the right flank as Drazhar prepares to line up into my Prince
Wracks move up onto my objective, taking down my banner.
Drazhar kills my Prince, who manages to take out Drazhar in return.
Chaos at end turn 3 - making a push back against Drukari as I manage to clear my right home objective.
Cultists and legionaires swap positions as I look for more durability upfield.
Chosen make a push on Drukari home objective, but I still can't chew through the upgraded Wracks.

I'm normally good at screening my backfield, but at this stage I'm struggling for assests and Mandrakes are able to find a easy spot to RND


Big moment - Corsairs fail this charge and Drukari are out of CP. 2 Venoms have to go in, but the Prince kills one. With the objective contested Chaos get a 12 point turn on turn 4 to take the lead on primary for first time.

Last Drukari push on my right flank. I burn my -1 to hit in combat strat against Court + Archon and one Legionary survives to keep hold of the point. He falls back next turn to keep me with the points and the Lord Discordant manages to clear the point.

More Drukari bundle into the Chosen. Its a slow stalemate going Drukari's way, but at least its keeping assets tied up.
Bad photo - but on my turn four I mostly leave objectives aware to keep my units safe. Going second, at the bottom of turn 5 I move back on them to secure another 12 point turn.

Result - 86-68 win for Chaos


Postgame thoughts: Given the match up, this was probably closer than it should have been. Whilst go forwards will all the aggression normally works, I overdid it here and was punished early losing a Warp Talon and Possessed unit for little benefit as Guilio expertly set his trap and baited me in. From there it took awhile for momentum to settle as things went back and forth - both primary and secondary were essentially even for the first 3 turns and it was only turn 4 were Chaos sneaked again for the first time helped by the critical failed Corsair charge to give them 12, and with the advantage of last turn scoring in there favour Chaos were able to swing 16 point lead over those two turns as a result. Really good game, one I felt I had been outplayed in the early turns but managed to at least leverage my match up well enough to recover from the start. Also I never want to fight another -1 damage Wrack or Grotesqe again, they were nightmarish to kill.


Round 5 - Secure Missing Artifacts v Simon Miller's Drukari


My Secondaries: Specimens of the Spider, The Long Warp, Warp Ritual

Opponents Secondaries: No Prisoners, RND, Take them Alive


Pregame thoughts: Back to back Drukari, more favourable mission this time more confident about this one. I wanted to really set up a head to head clash so deliberately made sure I move the no mans land objective more central to force Drukari into another front rather than let have 2 hidden back in deployment zones even if I could do likewise - I wanted both sides to be aggressive rather than let us both wrack up primary points sitting at home.


As the game was about to start Zac (tournament organiser) came over to inform us that if you won the game then you'd end up staying for another round, which if you were in the top 10 you'd get a bye for whilst the other undefeated players would play round 6 to ensure that there would be knockout games from there to the end with a potential 5 rounds to go. It did slightly affect my planning in the game as I felt if I could secure the game early and get a big win I might be eligible for top 10 (was on table 5 at the time.)


Chaos deployment, Chosen in the middle, otherwise mostly standard mirrored deployment.
Right flank - obsec and scary punchy units ready to push to try and hurt Drukari.
Drukari deployment hiding behind walls ready to counter attack.
Raiders hiding within the security of the large L building.
Typically keep my photo's to the game, my Simon struck up a pose so thought I'd include it.
Chaos turn 1 wasn't much of note, move up, cast Ritual in the middle. I am noticeably less aggressive this time having learnt my lesson from my game with Guilio
Drukari start by sending obsec units onto all 3 middle objectives.
No pics of my turn 2 in action - I send my Talons to take out the obsec and Hellions move in supported by Venoms filled with death.
Similar story on left flank as more Hellions emerge to take out my obsec.
Raiders line up Dark Lance shots, they didn't have a major impact on the game as later turns I was able to deal with them well.
Hellions defeat my talons and emerge relatively unhurt.
Battle for the middle - obsec Wracks with poison laughed at most of the defence my Chosen could put up, but Chosen were winning the grind better than last game.
In a pattern for the game, the left objective traded hands frequently, whilst it was hurting my primary it did ensure I was maxing Long War points each turn.
I commit hard to the right flank. My Discolords combine to flame a Venom to death and force Incubi to disembark.
Possessed take the left flank back as Warp Talons go on a spoiling mission as they start scratching Raiders paint and tagging others.

One squad of Incubi down! Hellions interrupted to take out most the legionnaires but I just about have obsec on the point.
Drukari turn - Chosen have destroyed the first Wrack squad and are about to murder the Haemonculi who fails to revive. Wracks retake the objective from the Cultists without much difficulty.

Tagging Raiders was great when it was Drukari's turn, but I would have loved to be able to fall back from them in mine and still charge.
Battle for the right flank heats up - Drazhar murders my Possessed, who take out most the Inucbi and scratch him. The Lord Discordant finish's the Incubi.
Chaos turn - Witches had retaken the objective so I surrond them - the surrounding is more about trying to deny access for the next wave to the objective easily as the Possessed guard the edge and the Lord Discordant can HI anything else.
A great turn on the right flank - The Nurgle Prince rolls a super smite into Drazhar and kills him, the Lord Discordant burns the Haemonculi to death and is freed up to charge and kill the Venom.
Right flank isn't secure yet but its a good position. Primary are still exactly even at this stage but secondaries are becoming a problem for Drukari with Warp Ritual going better than there RND pick.
Drukari still have obsec in the transport - similar to above the Chosen block the entrance to Objective whilst the Princes ensure nothings getting onto the objective without fighting.

Warp Talons still tagging transports, eating up Dark Lance fire. Simon was content to let his boats slowly fire there way out of combat and I was happy to ensure they couldn't snipe characters easily.
Nice play from Simon here - he charges the Spawn outside my HI range then consolidates onto the objective to keep my Discolord out the fight and retake the objective. I'd have been better off moving the spawn away.
Chaos response is to destroy the Incubi - the Succubus had gone in search of some Take them alive points but hadn't managed to kill my Dark Apostle. It fell back and my Nurgle Daemon Prince hunted her down
Middle surroneded with bodies - no way onto it for Drukari.
Some more nice play from Simon coming a second. He puts another wave of Drukari units onto my objective guarded by my Discolord and sends a Raider in me so the Discolord can't HI and is able to deny me primary again.

Blurry pic - but felt a picture of my heroic cultists was apt. Up until turn 4 they had score all my primary points (ignoring mission specific rules.)

Drukari are finally spent as Chaos wrap up a win

Chaos Win 95- 64


Postgame thoughts - Very happy with how the game went - broadly in line with how I wanted the match to go. The fighting over the no mans land objectives drained Drukari's forces, despite seemingly never ending, into a war of attrition, and whilst it took until turn 4 to get a lead on primary for Chaos they were scoring heavily on secondaries throughout whilst Drukari were slowly falling behind there as well. Whilst the Drukari pressure did keep my primary down throughout, the fact that they kept contesting objectives right till the end did at least meant Bile and Long War were both maxed which is a rarity and the forgiving mission primary meant I only ended up dropping 2 points. From there it was a wait to see if I'd managed to make the top cut and get a bye


Round 6 - The Scouring


So as it turned out 21 players went undefeated, so 5 players had to be eliminated in the round 6 games to get us down to 16. As it turned out I was 11th at this stage and was the lowest ranked player to get a bye, just avoiding the extra game. Instead I managed to have 3 hours to try and 'declog' my brain and chat with the others hanging around and resume a few debates with previous opponents - like is Fight on Death a good mechanic for the game and should Tau be allowed to exist? The only downside was it was starting to get late and the food trucks had left at this stage and I was rather hungry now. On the plus side, the bye did count as a 100-0 win which is technically the only time I've scored 100 points in a game, hurrah?


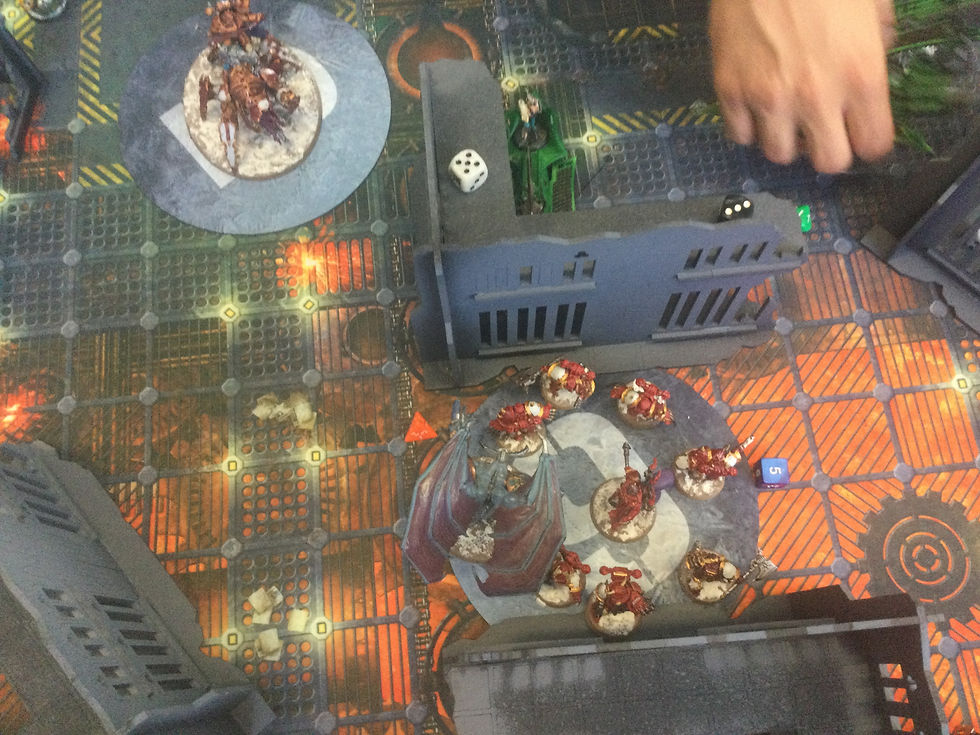
Round 7 - Conversion - Colin McDade's Sisters of Battle


My secondaries - The Long War, Specimens of the Spider, Banners

Opponents Secondaries - Defend the Shrine, Leap of Faith, Sacred Ground.


Pregame thoughts - So a bit of backstory to this one first - In my round 5 game I'd ended up playing on the table next to Colin and fellow Bile aficionado Dom Maidlow (of who'd I'd played at Unconquerable and both of us had ended up borrowing elements of each others list as a result.) Dom had said rather wistfully during his game v Colin that he'd rather be playing Drukari and I'd responded rather hubristically saying that I'd never lost to Sisters with Bile and I'd be happy playing them instead. Fast forward 6 hours later and I'm at a stage were I'm playing number 9 in ITC ranking overall and 2nd highest rated Sisters player and weirdly not feeling as confident as my historical less tired past self made out. The game itself was going to be tough - Colin had deployed very conservatively at the back so I could deploy on the line with impunity and try and rush forwards. Given the right objective was the closest no mans land objective to Sisters I made a (correct) guess that this would be the one they would pick for Defend the Shrine and set up much stronger towards this objective than my equivalent on the left flank - if Sisters wanted the Shrine I was determined it was going to cost them dearly.


Quaters deployment - Sisters well back from the line.
Chaos much more aggresive and not mirrored deployment for once. I'm sure the objective on the right is going to the Shrine so I have double Disco, double Possessed around to go fight for it.
Chaos get first turn, piling forwards
No secondary points going first, but getting into position to fight for the middle/right and screen out my backfield for next turn.
Sisters can't dislodge me from the objective, but they can retake it with obsec.
All the buffs, all the nasty melee punch hiding back waiting to be unleashed.
Chosen have no re-rolls, transhitmen (this part not relevant v Repentia) -1 to wound and 5+FNP. All 30 wounds were murdered by Repentia that started off roughly two miles away. Just a bit jealous!
Sisters had managed to put Obsec on the Repentia and when one live they contested the objective. Some Cultists had been cut down so I managed to respawn them back onto the middle to get a early 12. Possessed retook the objective from the Sisters obsec and the next unit screened the Disco lords from scary Melta shots.
Sisters had plenty of deepstrike and outflanking threats. I screen out my side of the table well but make a small mistake - I can move the legionaries slightly towards the objective and there isn't a reason not to with the spawn nearbye to help screen (Warp Talons behind the wall.) It comes back to bite me later.
Melta was a huge threat to me, and I tried to disrupt as possible. The Warp Talons managed to kill one squad and tag another, later stopping it from falling back. The Legionares charged a Rhino and tagged the next melta squad to force a CP usage at least. In Sisters turn the repentia move up to counter attack Possessed to the south of the shot.
Zepharim retake the Shrine (just to left of shot) after having been granted Obsec.
Round 7 - everyones tired and in a rush so a few less pics here. The Lord Discordants kill the Zepharim from the previous shot and noticably not picture are Repentia and Possessed who killed each other (this time Repentia fighting on death after I interrupt.)
Turn 3 and I'm running out of units. I throw my Prince forward to keep Sisters having to defend there home objective.
I've corrected my mistake from the last photo from this angle - but its cost me 4 primary points. Repentia came in outflanking and killed the Warp Talons on the other side of the wall (and died back in return.) The middle is very sparsely defended now.
Prince tags Melta again, Melta falls back and CP is spent to allow them to shoot. Zepharim prepare to make a 11 inch miracle dice charge into the middle.


More Zepharim came down and make a unbuffed 9 inch charge into my Legionaires and exactly kill them - just when I think I'm going to hang onto primary long enough. I'm still ahead but its slowing me down and its a 8 point swing as I can't dislodge them now.
When its starting to like momentum have shifted irrevocably a nice swing back - Vahl couldn't retake the Shrine this turn but murdered my relic Lord Discordant. Fighting on Death however the Lord Discordant managed to kill Vahl back and Sisters were now without a way to get any Defend the Shrine points.
Sisters points are catching up, but I'm able to keep things managble for another turn. My Nurgle Prince dies, gets better and along with the Slaanesh Prince reclaims the middle from Zepharim. I delibatly don't charge the crusaders to hopefully have some more Long War/Bile points next turn.
Spawn doesn't fancy taking on the Zepharim and can't take the point back, but does sit on it to ensure Sisters can't move away as there's a reasonable chance it survives a round of combat/shooting. Spawn has had a great tournament screening things out and deserves more of a mention.

Didn't get any T4 Sisters pics - they shot some stuff and killed my Nurgle Prince again and started getting a bunch of secondary points for Sacred ground and leap of faith. Come turn 5 my Discolord blocks the objective from any easy way to get to him and its even if he's dislodged with melta the spawn is there as backup to ensure Sisters can't get there Shrine back.

Retributors chain up with obsec and a hosptilar revives one onto the objective to ensure they get some more Sacred ground at the end.
Very sparse amount left on both sides.
Sisters melta burns the last Daemon Prince to death and the Apostle is charged but its just to late for Sisters to complete a comeback on primary after a slow start.

Result - Chaos Win 89 -77


Postgame thoughts - Suitably, typically brutal game. After a few good early turns the question turned to could I survive the Sisters counter attack long enough to make it to the end and I just about did. I thought the moment when the Zeraphim made a non-miracle dice deep strike charge into my Legionaries on the top left objective was going to swing the game back to Sisters (and exactly killed them off it just to rub it in.) The game had several potential decisive swings but denting the Sisters defend the Shrine to only 6 points was a real point of difference between the Sisters - with Sisters deploying defensively I had more units there and even though Sisters managed to hold the objective via Obsec for two turns they never had enough spare units to push me out of there deployment/away from middle and the Shrine at the same time and when the Discolord traded with Vahl it marked the end of the Sisters chance to defend. Sisters really force a aggressive response with the power of there secondaries and there units are just so murderous. Chatting with my various opponents after the game they often (rightly) had a good natured moan about the strength and challenges of Bile's fight on death but when a 112 point Sisters repentia unit can kill 30 wounds worth of Chosen through no hit re-rolls, transhitmen, -1 to wound and 5fnp and survive the fights on death swing back with a model left you'll forgive me for thinking that CSM need a powerful combat mechanic to keep pace!


So at this stage I was still undefeated and into the top 8. It was 6 hours after the majority of people had left the venue and I was shattered. A long sleepy drive (with windows open in a freezing car to keep me awake) and some shovelled down food later I had to set a worryingly early alarm to get back to the venue next morning to ensure I wasn't getting stuck in the M25 rush hour traffic. Whilst I hadn't planned on getting to day 3, I was able to attend as I've booked the day off after a 40k tournament to recover/have a actual weekend for awhile now so I was able to attend.


Round 8 - Recover the Relics v Nassim's Tau


My secondaries - Banners, Ritual, Specimens of the Spider

Opponents Secondaries - No Prisoners, Decisive action, Banners.


Pregame thoughts: All the nope. Tau pose so many problems for CSM - they don't really care about fight on death, they are super efficient and killing you and are mobile enough to stay out of threat range and dance back in when needed. When playing tau in the past I have one plan - to try and deny them primary for as long as possible before getting murdered but the primary on this mission is horrendous. Que the foreshadowing music from earlier, as the round 8 'bonus' mission is in effect outside the normal mission pack with 3 easy to defend homefield objective for each of us and a hold 1/hold 2 so I need to cross a very sparse no mans land and make charges onto 2 objectives to deny 4 primary. I had two gameplans depending of if I went first or second. Go second - I can try and play super defensively, hiding stuff to try and force Tau to get closer to get no prisoners points (I'd hoped they might take Assasinate as well and fall into that trap but it was a super long shot) and try and sneak a primary lead late on or if I went first it was a all out rush to see if I could get in position for a turn 2 strike onto Tau objectives to keep the scoring down. I won the roll of for first turn (kinda wanted to go second but both had there pro/cons) and went all in on rushing downfield into the Tau guns (presumably my army fuelled with thoughts about charge of the light brigade as it moved up.)


Chaos deployment - Discolords in the open but far back enough they can't be closest target. I do try for some bait here - the Apostle can be easily sniped by the Bombers if they want to, but I can sent my flying units to retaliate next turn and the Apostle is surprisingly tanky.
Tau deploy in a similar manner back - Planes deployed in such a way they can fly off T1 if needed.
Chaos turn one - the red Discolord can be targeted but I view it as expendable as anything else so not bothered as it gets to shoot a plane and takes 10 wounds from it.
Slaanesh prince fails FNP spell as the Nurgle Prince screened by Chosen casts the first ritual.
Tau prepare to respond in with maximum brutality. They weren't upset to go second and see Chaos throw themselves forwards.
Kroot Hounds and Fire warriors move block the easy way to Tau lines.
Unusually for me, I put a Warp Talon unit in deepstrike so Tau had to screen there backfield. I then completly forget about the Warp Talons until about 3 hours after the game on the journey home.
The two fliers getting into position to snipe my Chaplain beneath them. Nassims original basses for his fliers were borrowed for the steam game next to us.

My dead pile after T1 - so much was dead I lost track that the Warp Talons in the middle were actually for deepstrike and not dead (although as I mentioned I forget so they were essentially dead.)
Tau made more charges than I had as there Commander with all the re-rolls charged my Warp Talons and killed 2 - who said fights on death never matters v Tau?
Chaos after there turn 2 - I murder the screens, pile onto one Tau objective to take down a banner, but its not enough to deny primary. The big Crisis squad in the middle are essentially unchargable with there free overwatch and too resilient to damage even if I throw away a sacrifical unit so I resign myself to tanking them over and over again.
Chosen on the far left kill the commander as at least i'm in a good position on secondaries.
Tau deep strike reinforcements and all my charaters are in the open.
Tau actually don't kill that much turn 2 - only killing one unit but leaving the last Chosen down on wound one. I use it to tank the overwatch of another Commander so my Nurgle Prince can charge/kill it to get some more Bile points. The Slaanesh Prince moves up to finish the Warp ritual.

I've screened out my backfield again to ensure Crisis suits can't get behind me. A decent tactic that didn't matter - there's some cultists hiding behind the wall just behind the objective on the left (they have to be visible to be on the objective.) They took some casualties and can respawn onto my objective if I get the chance for a 12/need them for a 8 if another objective is taken. The chance never arose, but it was solid play rather than expose them needlessly.
I only have characters upfield at this stage. The Lord Discordant takes a absolute hammering like a champ but eventually goes down.
A minor glimsp of hope - the Prince is killed and charged by Kroot (who I have to respect enough to spend my last cp at the time to make -1 to hit.) With exploding 6's a option if the Prince does something truely heoric and kills them all with help of morale I might be able to stop Tau primary. Sadly doesn't occur (it is admittedly a huge long shot) but its moments like this I have to take to deny Tau some primary. I h
On a more embaressing front - Tau charge the Slaanesh Daemon Prince to tie it up - it kills a drone then gets punched to death by Crisis suits. I presume the gods will mutate him into a spawn as punishment for the next game.
Overview of the battle before my Slaanesh Prince in the middle is killed.
Reverse shot of the battlefield, My turn 4 took about 2 minuites. My Prince killed the Kroot for some Long War/Bile points and retook the objective but I'm spent.
Tau move up and prepare to destroy my objective holders. I just hold onto 2 objectives with my legionaries to keep the score close but Tau have a easy 12 point turn next two as Chaos are tabled.

Result - Tau win 92-86


Postgame thoughts: To be honest, at the end of the game I had no thoughts. At this stage the lack of sleep, odd nutrition situation and mental effort had taken a toll and by about half way through the game I'd got a splitting headache and was in a bit of a daze - I actually had to take a walk/lie down outside for awhile after the game as I didn't feel in a safe state to drive back for awhile. Thankfully(?) Tau don't really really on interaction so I could tune out on Nassem turn and roll 100's of saving throws and remove my models from the table and refocus during my turn to move my tattered remains around. When I had time to refocus and think back, I was happy with how I played despite the loss - I did forget I had a Warp Talon unit in deepstrike who did actually have the potential to close the gap in points but it would have required a 11 inch charge out of deepstrike (after Tau -2 to charge strat) and I'm not sure it would have been enough to change the result (there's a outside chance were they tag something and stop it falling back to change the game but its a huge long shot.) That noticeable aside, given how battered my army had gotten keeping the game close on the scoreboard was a result - I'd kinda written the game off before even arriving. There a part of me that thinks on a different mission I could have won given the scoreline (I might have even edged it if it was a hold 2/3 mission), but equally over the event I'd had a pretty good run of match ups and missions so I can't complain overall.


As for the event overall - I was thrilled with how I did. I'd hoped going into this I'd have a decent shot at top CSM to go with my top Chaos award last year but despite ending up 5th overall, I was third on CSM rankings. Still going 6-1 + bye was great and no shame in losing to Tau in round 8 of an event on a tough mission/terrain set up.


As for the list itself - I loved it. Its about as fast as you can make CSM without Bikers (who I tried but didn't rate) has decent durability and the list felt well rounded with various spread of threats to allow me to choose match ups for each fight were needed. The second Lord Discordant without a relic probably is the most cuttable option, but nothing jumps out as a super obvious pick to replace it - without it the 4th HQ + Patrol looks odd and then you end up back with a awkward choice around HQ's. Abbadon is the elephant in the room when that option comes up as he brings the extra smash HQ option without a patrol, but to be honest I don't rate him highly in this list - he's slow, lags behind and I tend to dominate the middle without him. Lots of Chaos lists doing very well with him so he's clearly not a bad choice, I'd just rather have something faster and the 2 Lord Discordants do offer a non-trivial amount of shooting that can pop the odd transport and at least force opponents to pretend to hide stuff turn 1. The Slaanesh Prince is another cuttable option that creates a problem if you do. He's fragile and not that damaging for his cost, but has a really good spell (that can be replaced) but he makes Warpcraft secondaries so much scarier without if its just the Nurgle Prince casting them.


Warp Talons and Possessed were probably the stars this event - typically the Chosen were my MVP over a tournament and they were certainly awesome but the Talons probably get my pick for best unit. A little fragile they can disappear much quicker than you'd like but with a nice general usage attack profile, fly 13 inch move and a 5+ invul they were at least non-trivial to kill and tended to bully anything else contesting flanks and dig out obsec units hiding at the back. Not sure they survived a single game, but they didn't need to be great, and when they normally had Possessed slightly further back doing a very similar role with a tougher to remove profile following up. Certainly some varied Bile options available - but as far as this version of the list goes I wouldn't make any tweaks to the list if I went to the LGT again tomorrow.


Onto a side discussion I had repeatedly - is fight on death too much as a legion trait? Probably yes - but there's at least some defending it. As I mentioned in my Sisters game Chaos units don't really hit as hard/fast or even necessarily as resilient per point as a lot of other top tier combat units (Repentia, Incubi, Sanguiary Guard etc) so they do need something to help keep them on a level playing field (ignore that Emperors Children won the LGT and came also came 3rd) and you can argue its not as powerful as say Leviathan's trait, but its certainly up there with most powerful trait in the game. Fight on death army wide does skew the match ups too much though, and whilst CSM might not be a problematic army for the meta, having such a strong rock/paper/scissors element for army creation is not ideal. I hope GW doesn't copy how Dark Harlequins went as it did feel like overkill - I think a happier middle ground would be one of:


  • Only allowing a subset of units to fight on death one of characters / Core / Deamonkin /Unmarked units for example

  • Having fight on death be worse than making regular attacks - only trigger on a 3+ on a per model basis or imposing a hit modifier so your still incentives to make charges

  • Remove fight on deaths army wide, but give Bile a 0CP strat to fight on death so its a choice and crucially limited to a single unit per turn - this would be my personal favourite as it keeps the flavour of the army but adds in a different element with more skill/decision making and potential counter play options from the opponent.


Hope you enjoyed reading this!


617 views0 comments
bottom of page